In this article
A decorative witch hat changes character through the relationship between cone and brim. A broad edge needs room on a shelf, a crooked tip changes the side view, and a flat applique asks for a receiving panel rather than a freestanding base. Those differences are more useful to compare than color alone.
These nineteen concepts are intended as seasonal display directions, with several flat and mounted alternatives. They are not wearable size recommendations or complete tested patterns. Use appropriate instructions for the selected construction and make a representative finished sample. A soft tip, openwork cone or neat band in an illustration cannot establish the hidden support, actual fit or behavior of another finished object.
1. Straight cone display hat
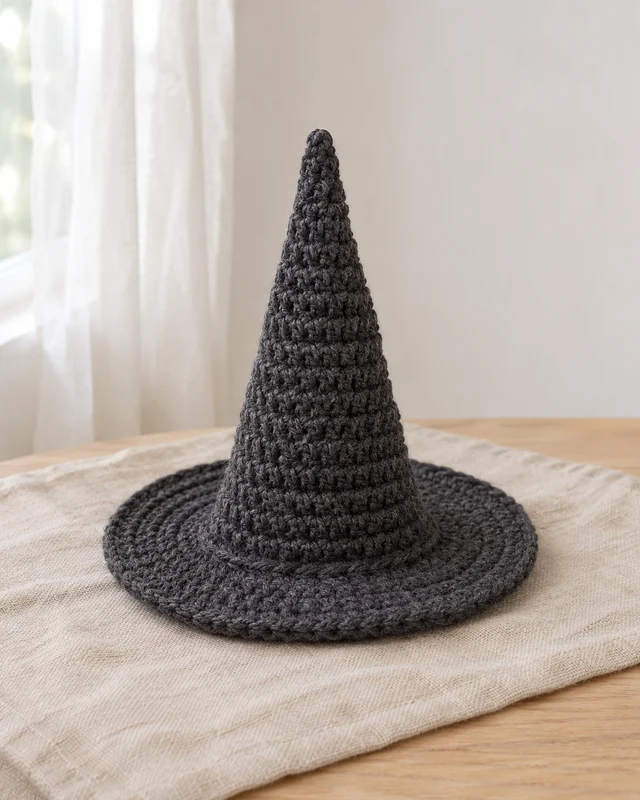
A straight cone and flat brim form the clearest reference for a decorative witch hat. Use a complete display-scale construction so the crown and brim meet at a deliberate circumference. Set the finished hat on its intended surface before adding a band. This collection explores decoration, not wearable sizing; the illustrated cone cannot establish an adult or child’s fit, head opening or comfort.
2. Crooked tip hat

A bent tip adds movement to a small hat without requiring a taller crown. Follow a design that builds the curve through shaping or a suitable soft construction. The bend should remain intentional after finishing rather than depend on an improvised hidden support. Compare the hat from the side as well as the front so the curve does not obscure the brim or make the whole display lean.
3. Broad-brim hat

A broad brim changes the footprint more than the cone height. Measure the shelf depth or table space and allow the entire edge to remain visible. Keep the brim flat through the selected shaping sequence. If it waves or cups, inspect that construction before decorating it; a wide band or extra applique will not resolve an outer edge that has been made to incompatible counts.
4. Narrow-brim hat
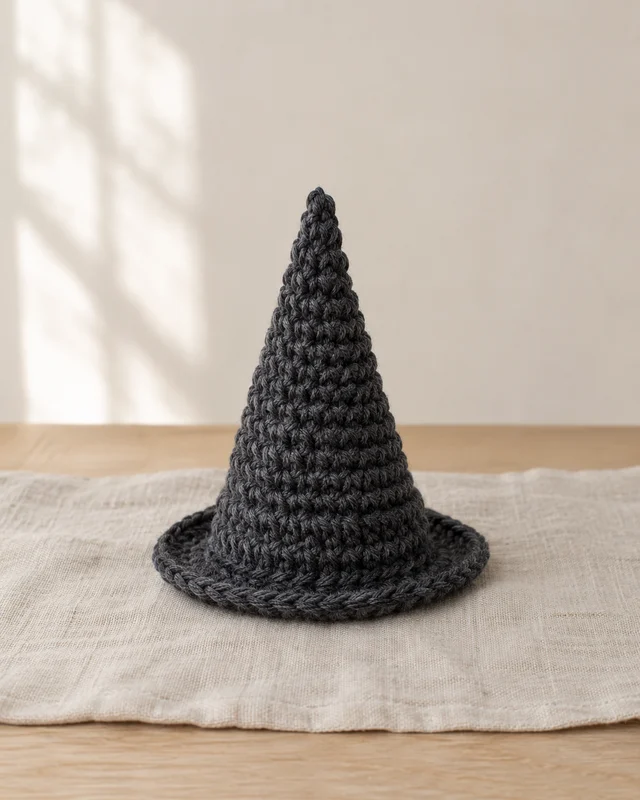
A narrow brim can suit a compact shelf group where wider hats would overlap. It still needs a defined junction with the cone and enough structure for its intended display. Make the full small sample before repeating it in another color. A short outer edge is a design choice, not a shortcut that removes the need to check the crown shaping and finished resting position.
5. Sage band hat
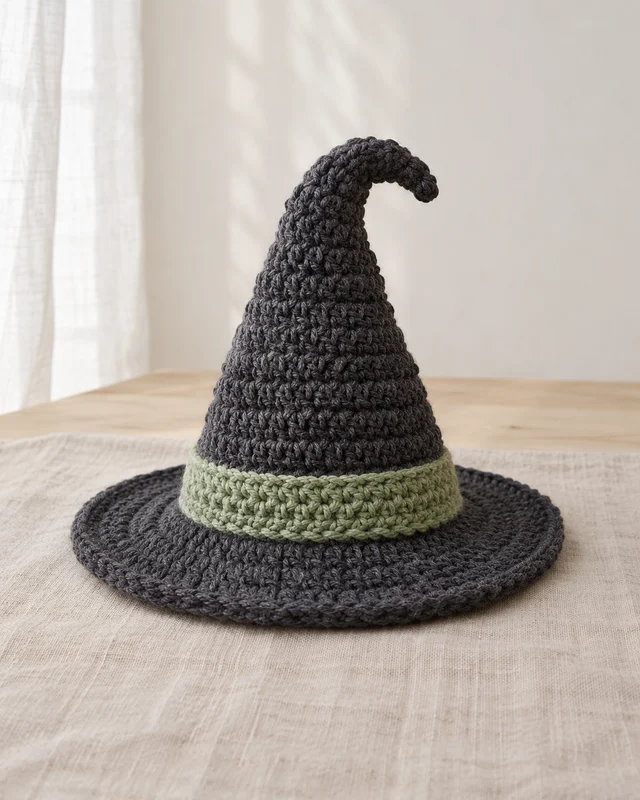
A broad sage band gives a dark cone a clear base line. Fit the band around the actual completed crown without compressing its lower section or lifting the brim. If the band is separate, plan a supported attachment or clear removable fit. Its color can connect the hat with leaf decorations, while the hat’s shape and resting position should already work before the band is added.
6. Cream-and-charcoal hat
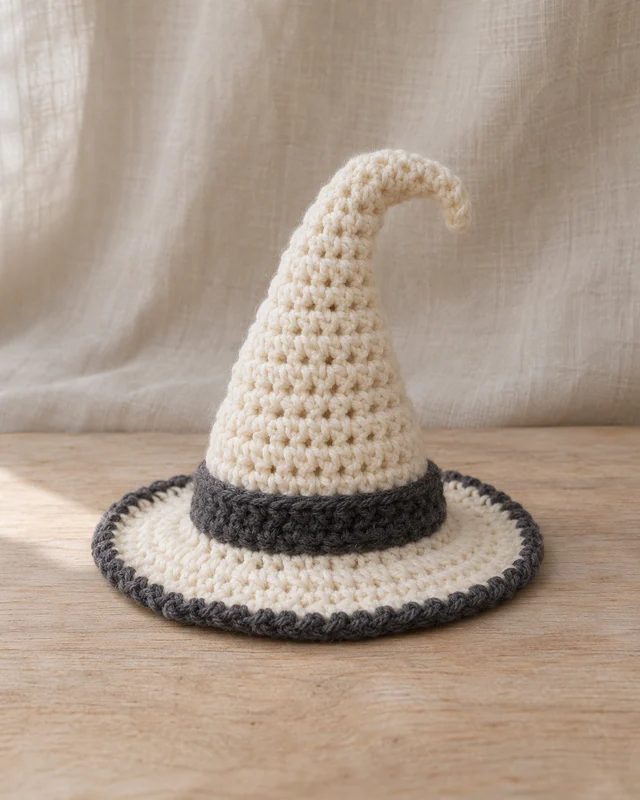
Cream with a charcoal edge reverses the familiar dark silhouette and can stand out against wood or a dark wall. Keep the contrast limited to a few defined boundaries. The pale fabric makes joins and changes in shaping easy to see, so inspect them before adding another accent. A quiet two-color hat can be more readable in a crowded display than one with several competing stripes.
7. Striped cone hat
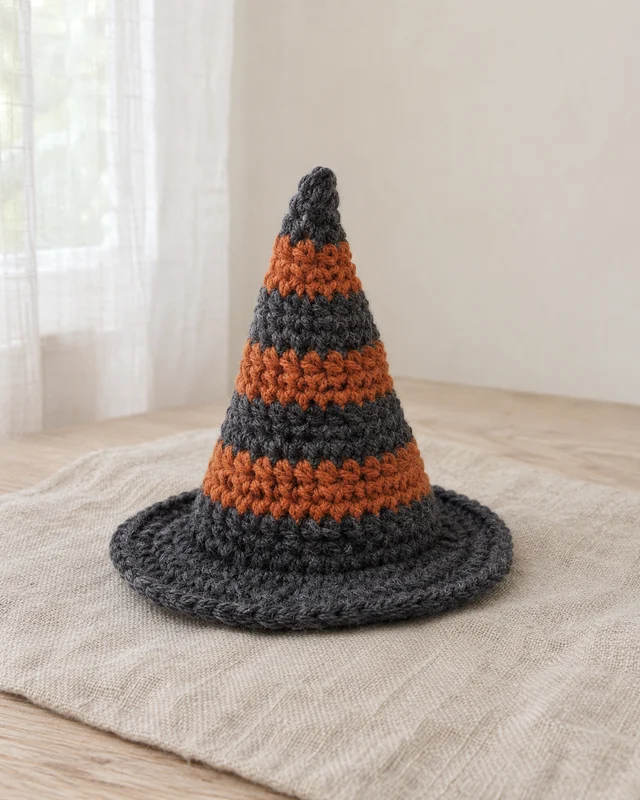
Horizontal stripes make the cone’s changing width visible. Reserve enough of each color for the wider lower rounds and maintain the selected shaping through the changes. Finish ends where they will not create obvious bumps in the display surface. Lay out the intended stripe sequence first; a leftover color can be better kept for another small motif than forced into a narrow final band.
8. Ribbed cone hat
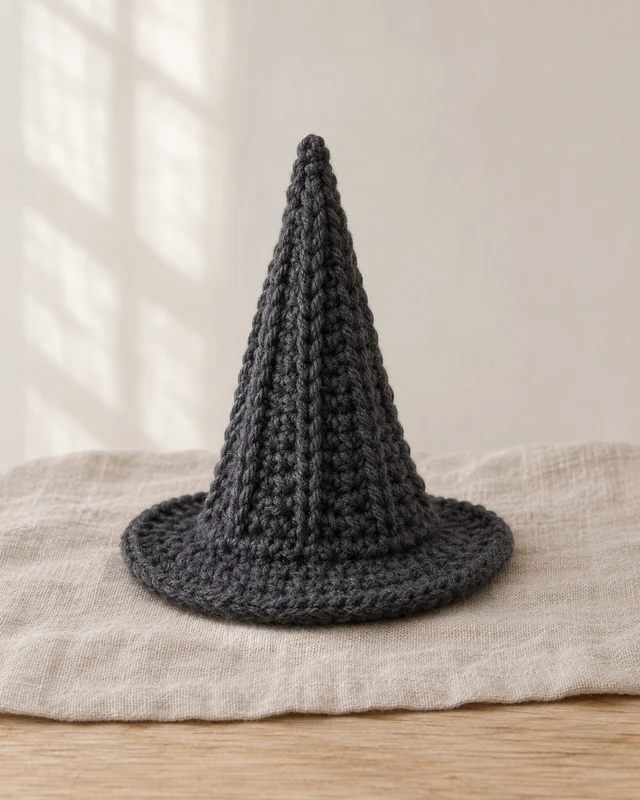
Vertical rib-like texture gives a plain cone direction without a separate trim. Sample the chosen texture and shaping together, since the ribs may alter the relaxed fabric. Keep the brim calmer so the crown remains the focus. The pictured lines are illustrative rather than counted instructions, and a complete design is needed to determine how that surface can taper to the actual tip.
Keep a decorative cone distinct from wearable sizing
These concepts are display directions. Choose complete instructions for a real wearable if that is the intended job, with measured fit and appropriate materials. A broad brim and dramatic tip in a photo cannot provide those figures. The fall and Halloween hub routes the decorative setting considered here.
Change the support or move the hat into a flat format
9. Openwork display hat

An openwork hat needs a suitable way to keep its outline visible in the display. A separate form or mount must suit the actual construction rather than stretch the holes into a different repeat. Plan compatible handling and access to any support. A pale base can clarify a dark outline, but it cannot turn an improvised material into a proven structural or heat-resistant component.
10. Scalloped brim hat
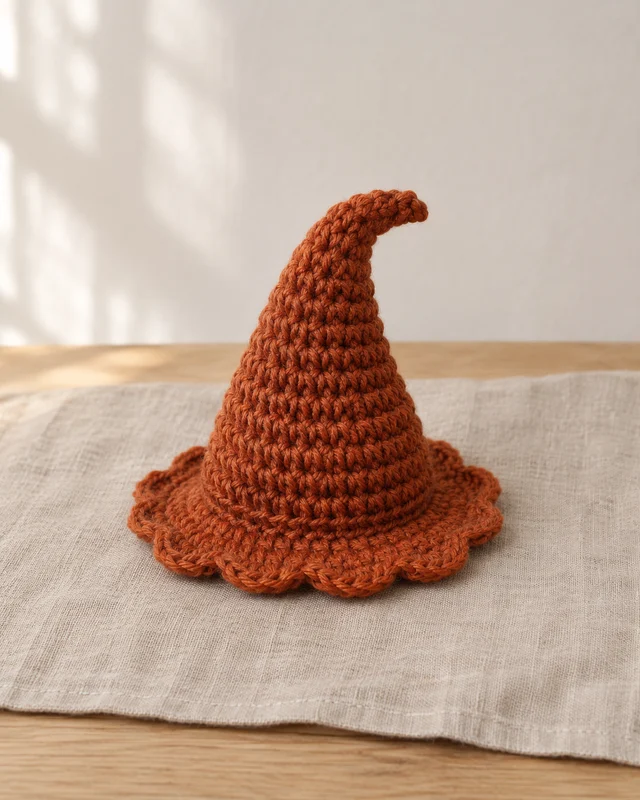
Small scallops can soften a hat’s brim while leaving the cone uncomplicated. Count the outer repeat against the selected foundation and assess the relaxed edge before adding a band. The scallops increase the visible footprint, so compare their full width with the intended surface. A restrained border often keeps the witch-hat shape clearer than large loops or trim that hides the circular brim entirely.
11. Folded brim hat

A slightly turned front brim changes the profile without requiring a new color. The fold should belong to a fabric and finish that support the intended shape rather than a forced crease. Compare the front and side views after finishing. Decide which way the hat will face in the actual arrangement, leaving the cone visible instead of letting a dramatic fold cover the feature it is framing.
12. Flat witch-hat applique

A flat applique uses the hat silhouette without needing a freestanding cone. Keep the pointed crown, brim and band distinct through the chosen shaping sequence. Finish the piece separately before positioning it on a panel or bag. The receiving fabric and attachment method matter; a patch should lie naturally and remain clear of a working opening rather than simply filling an empty space in the composition.
13. Hat wall pennant

A hat patch on a pale pennant gives the dark outline a consistent background. Leave a margin around the brim so it does not merge with the banner edges. The upper tabs support the whole panel independently of the applique. Finish and settle the triangle first, then place the hat, checking that the final arrangement hangs level without needing the patch to conceal an uneven corner.
14. Hat hoop panel

A hoop panel contains the hat within a simple circular frame while the applique itself stays flat. Prepare the fabric background and compare the motif position before fixing it. Avoid stretching the crown point toward the hoop to make the arrangement look taller. The complete display should be removable or cared for through a clear method that respects both the crochet and the surrounding materials.
Try the band or patch on a settled shape
Finish the receiving cone or panel first, then position the accent without compressing the body or obscuring the brim. Keep the actual connection easy to inspect. The color-and-texture guide helps decide whether contrast is needed before another decoration is added.
15. Mini hat ornament

A miniature hanging hat needs a supported loop and a complete small-scale construction. The cone tip can be a vulnerable attachment point, so follow the selected design rather than threading a cord through one convenient stitch. Finish one whole ornament before deciding how many to make. Its small size and soft surface do not establish suitability for a child, pet or any place with repeated pulling.
16. Flower-band hat
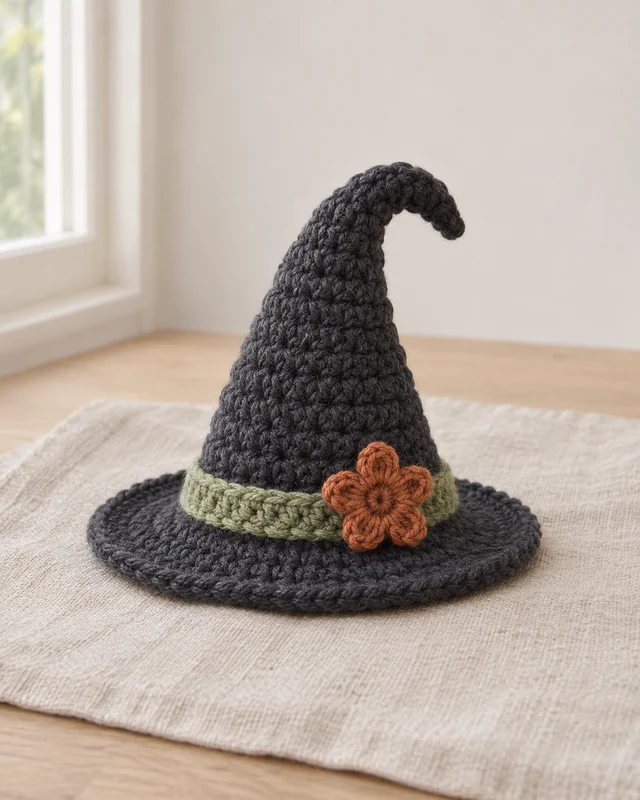
One flat flower can add a focal point to a plain band without covering the cone. Keep its scale modest and try the finished applique against the actual hat before attachment. The flower and band should share compatible care. Secure the motif through its supported area rather than just one petal, leaving the brim and the main hat outline clear from the intended viewing angle.
17. Patch-panel cone hat

Broad geometric panels can turn the cone into a color study instead of a striped object. Plan their placement with the actual crown shaping so the boundaries meet deliberately. Compatible finished fabric matters when several yarns join within a taper. Complete a representative connection before assembling the whole hat, and let the brim stay quiet enough to frame the panel layout rather than compete with it.
18. Soft spiral-tip hat

A gently curled tip can make a soft display hat look playful. Choose a complete construction that creates the curve through its actual fabric and shaping, without assuming the picture supplies a hidden frame. Keep the brim and resting base settled first. A dramatic upper curve should be the finishing feature of an already coherent object, not a way to disguise an uneven or unsupported cone.
19. Two-size shelf pair

A two-size pair creates a small shelf arrangement with a clear hierarchy. Measure the real display space and compare the completed hats side by side before adding other objects. Different cone heights can be enough variety when the colors and brim treatments are restrained. Keep construction and care records for both pieces, since similar silhouettes do not mean their shaping, joining or storage needs are identical.
Read the front, side and whole footprint
Set the actual finished piece in its intended place and compare cone direction, brim width and resting base. Keep hidden support and material behavior separate from the illustrated surface. Use the seasonal storage guide to reserve room for the cone and brim instead of pressing the hat into a flat box.
- How to Choose Fall Crochet Colors and Textures
Choose fall crochet colors and textures through a room anchor, clear palette roles, small comparable samples and an actual material record.
- 13 Cute Crochet Halloween Gift and Treat-Bag Ideas
Compare 13 crochet Halloween gift and treat-bag ideas, with practical notes on openings, lining, separate packaging and reusable presentation.
- 23 Crochet Autumn Table Decor Ideas
Find 23 crochet autumn table decor ideas across runners, mats, napkin bands and small containers, with flatness, fit and care in view.
- 15 Crochet Fall Garland Ideas for Mantels
Explore 15 crochet fall garland ideas for mantels, with notes on leaf shapes, geometric motifs, color rhythm, connections and real display space.
- 17 Crochet Bat Ideas for Halloween Displays
Compare 17 crochet bat ideas for Halloween displays, including wing shapes, contrast, mounted panels, garlands and small paired motifs.
- 21 Crochet Ghost Decoration Inspirations
Explore 21 crochet ghost decoration inspirations by outline, display method, backing, attachment and useful seasonal scale.
- 25 Crochet Pumpkin Decor Ideas for Fall
Compare 25 crochet pumpkin decor ideas, from shaped shelf pieces to flat motifs, small containers and autumn display pairings.
- Fall and Halloween Crochet Ideas for Cozy Seasonal Decor
Plan fall and Halloween crochet by room, object role and palette, with routes to seven idea collections and practical color and storage guides.
- How to Plan and Store Seasonal Crochet Decorations
Plan and store seasonal crochet decorations with clear removal, compatible care, supported shapes, identified parts and a useful next-season inventory.