In this article
A Christmas stocking is more than a long sock shape with a festive color change. Its heel, toe, opening and hanging point determine how it looks and how it can be used. A flat two-panel decoration, a shaped continuous body and a lined patchwork stocking involve different making and finishing decisions.
These twenty-one designs offer ways to compare those decisions before choosing a complete pattern. Measure the intended display space, including the loop, and read the foot and cuff instructions before starting. The gallery illustrates possibilities rather than supplying exact stitch counts or a tested carrying capacity. Decide whether you want a decorative miniature or a larger display item, then choose the construction and materials around that purpose.
Read the stocking from toe to hanging loop
| Part | What to decide before starting |
|---|---|
| Foot and heel | Flat outline or shaped volume; complete shaping instructions |
| Leg and cuff | Visible height, opening and any fold |
| Interior | Decorative use or an appropriate lining plan |
| Hanging point | Pattern-supported loop and intended modest contents |
1. Flat two-panel stocking
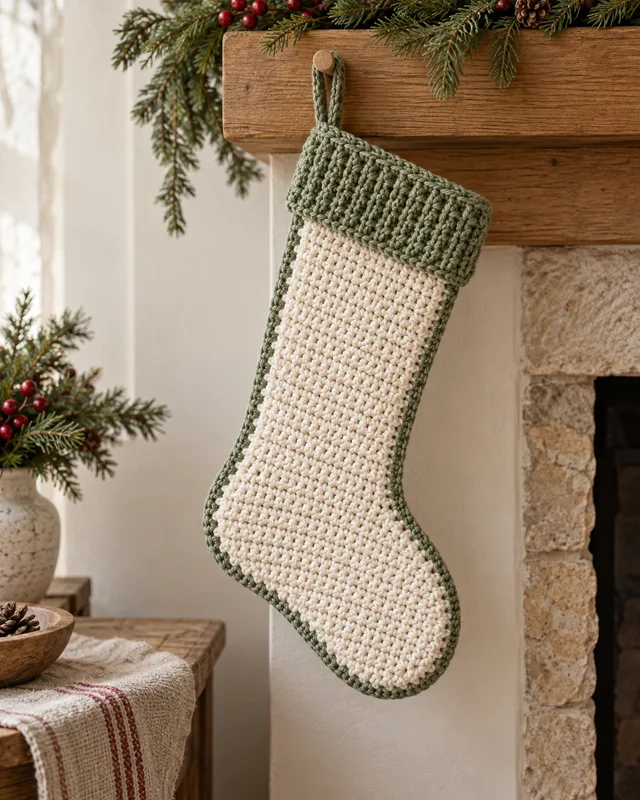
Flat front and back panels make the stocking’s outline easy to inspect before assembly. Match the heel and toe points carefully, then join without pulling one edge shorter than the other. A visible contrast seam can be an intentional feature. Choose the finished dimensions from the actual pattern; a flat decorative shape does not automatically provide the same usable opening or capacity as a rounded stocking.
2. Shaped continuous-body stocking
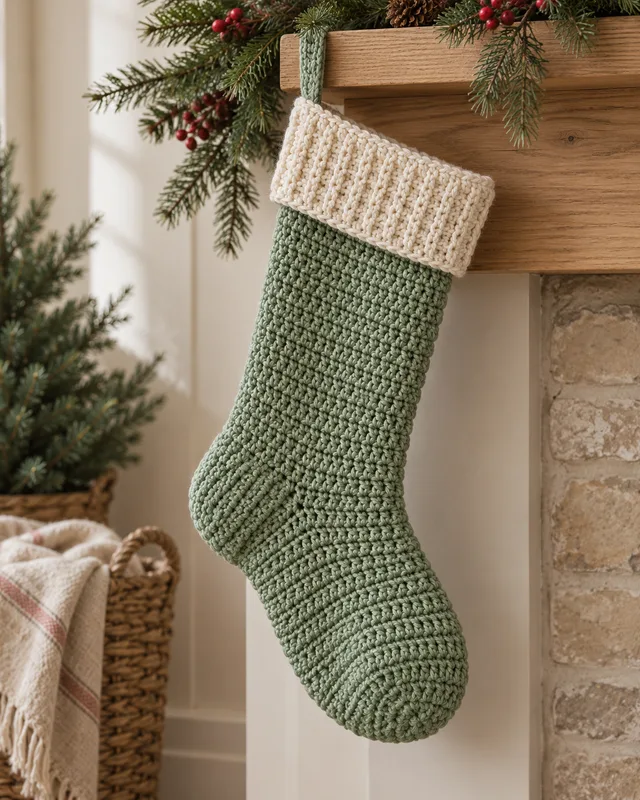
A continuous body reduces long side seams but makes the heel shaping part of the crocheting. Read that section in advance and keep the round marker where the instructions specify. Check the foot direction before extending the leg. This can be a satisfying construction to learn, but fewer seams do not mean the shaping can be followed without a careful stitch count.
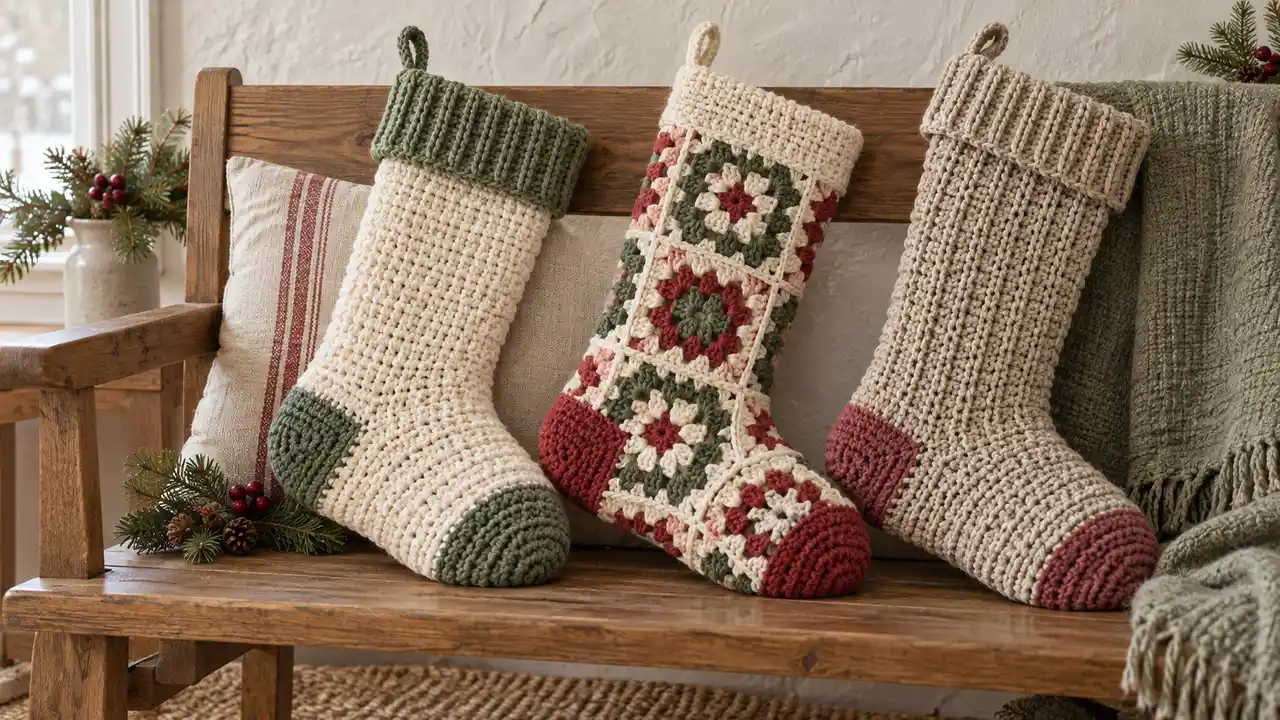
3. Contrast heel-and-toe stocking
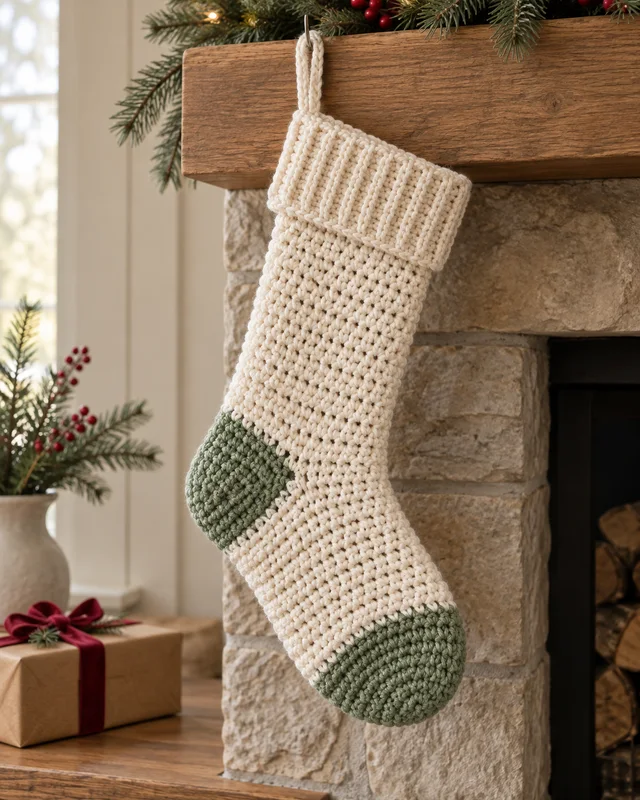
Distinct heel and toe panels make the stocking’s construction visually clear. They may involve color changes, separate sections or a particular joining method, depending on the pattern. Check the transition between colors as well as the shaping. Secure the ends before access becomes awkward, and compare the finished foot proportions rather than assuming contrast alone will make an uneven shape look intentional.
4. Granny-square patchwork stocking
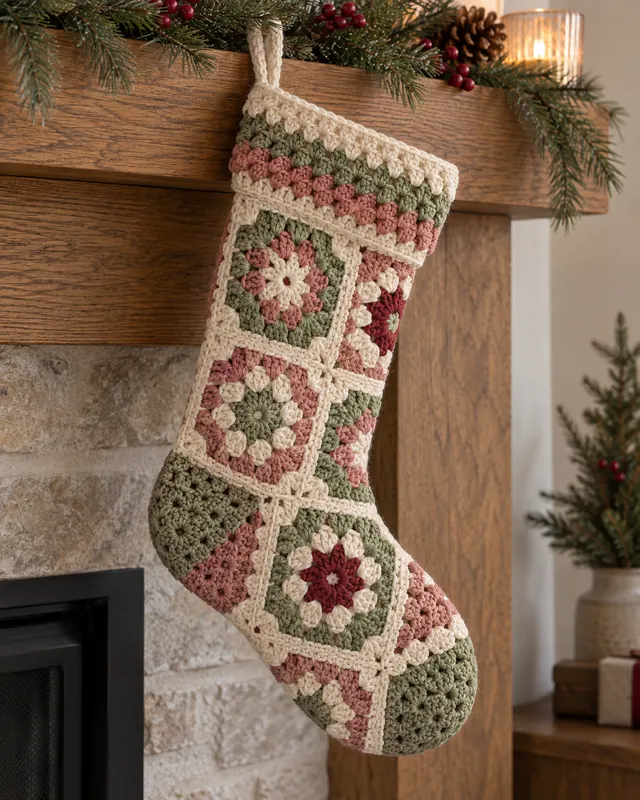
Granny-style squares turn the front of a stocking into a patchwork arrangement. Make and finish a sample square before planning the whole layout, especially if several yarns are involved. Equal stitch counts do not ensure equal dimensions when the materials behave differently. Read how the motifs form the heel and toe, and include the joining work in your making schedule.
5. Deep ribbed cuff stocking
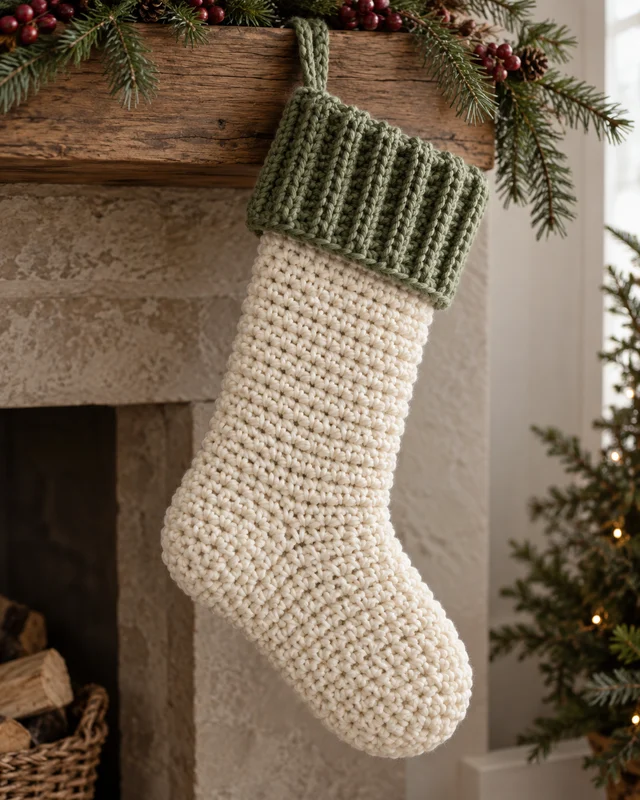
A deep ribbed cuff gives a plain stocking a strong upper section and a little visual weight. Its stretch and thickness need to work with the opening below it. Follow the pattern’s method for attaching or continuing the cuff, and check that it does not pull the leg inward. A deep cuff is decoration and construction, not evidence that the stocking can carry a heavier load.
6. Fold-over top stocking
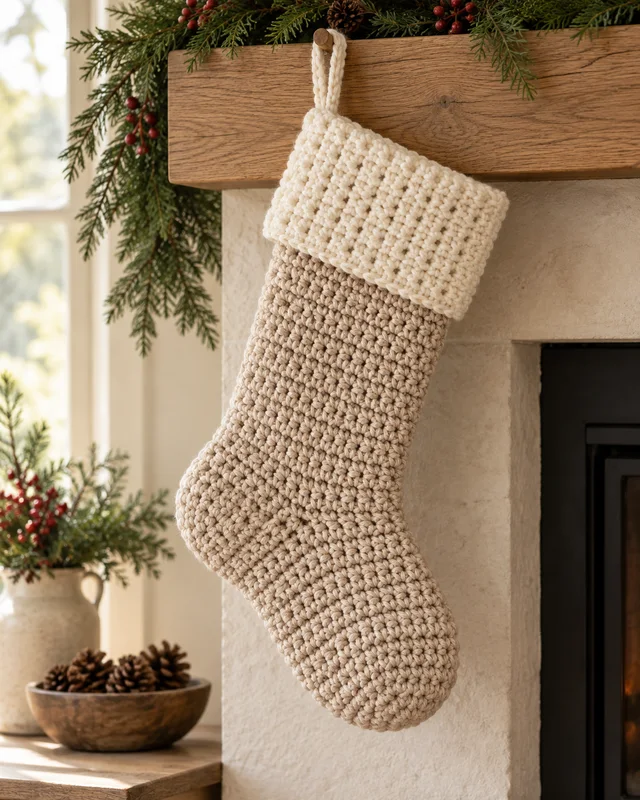
A fold-over top shows the reverse side of the fabric, so check both faces of the sample. The folded section changes the visible height and can add bulk around the hanging loop. Choose a pattern that accounts for that fold rather than adding an arbitrary extra length. Assess the opening after folding, while any lining or attachment seams are still accessible.
7. Narrow-stripe stocking
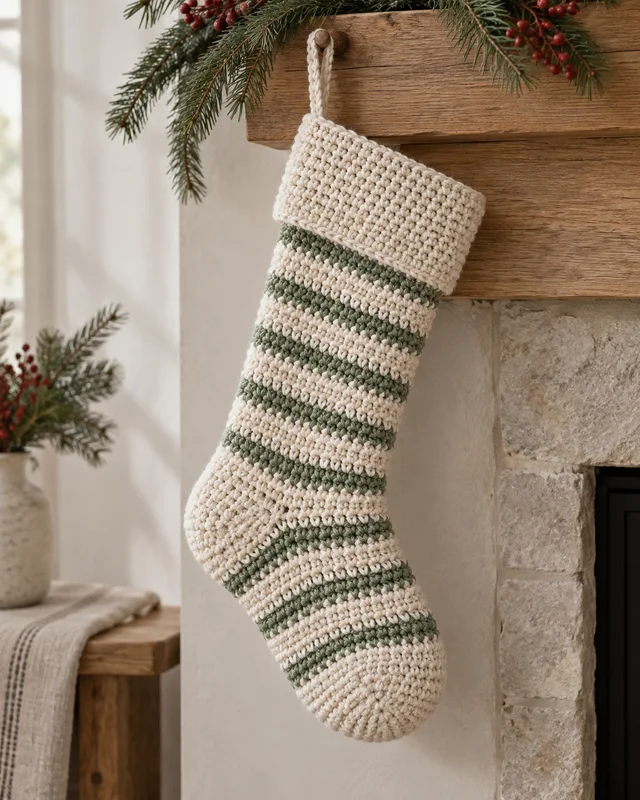
Narrow stripes create a regular rhythm across the leg and foot. Plan the color changes and the handling of unused yarn before beginning, particularly around the heel. Several small stripes can create more ends than the stocking’s size suggests. Keep a clear record of the sequence and check that the edge or round transition remains tidy on the side that will face outward.
8. Diagonal color-block stocking
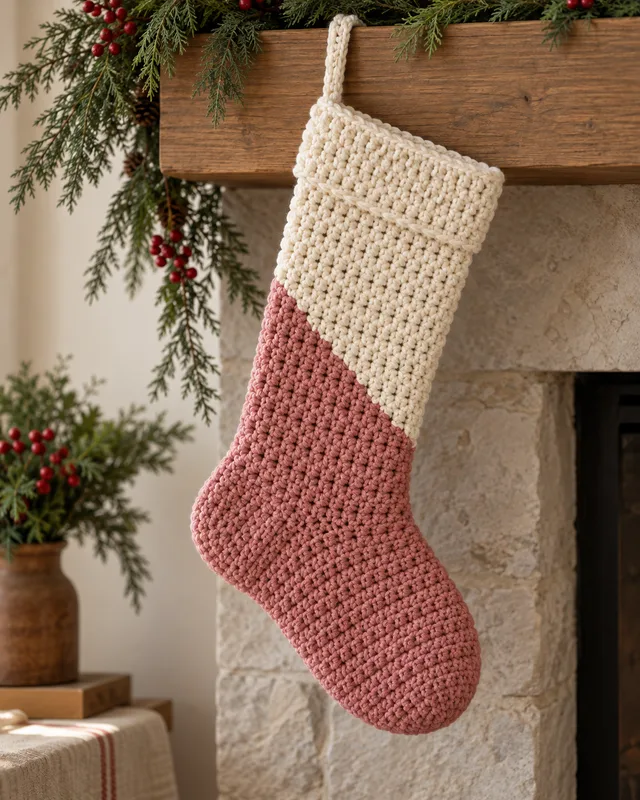
A diagonal color block makes one broad shape more prominent than repeated bands. Look for instructions that explain the color boundary through the stocking’s shaping. A diagonal line on a photograph does not establish where to change yarn in each row or round. Keep the rest of the finishing restrained so the graphic division remains clear rather than competing with an elaborate cuff.
9. Raised-column stocking

Raised columns give a stocking direction and texture without requiring several colors. Sample the actual crochet texture, including its reverse side, before committing to the full leg. The raised areas may affect thickness and dimensions. Follow the pattern’s transition into the heel and toe instead of carrying the column arrangement through every shaped section without checking the instructions.
10. Bobble-band stocking
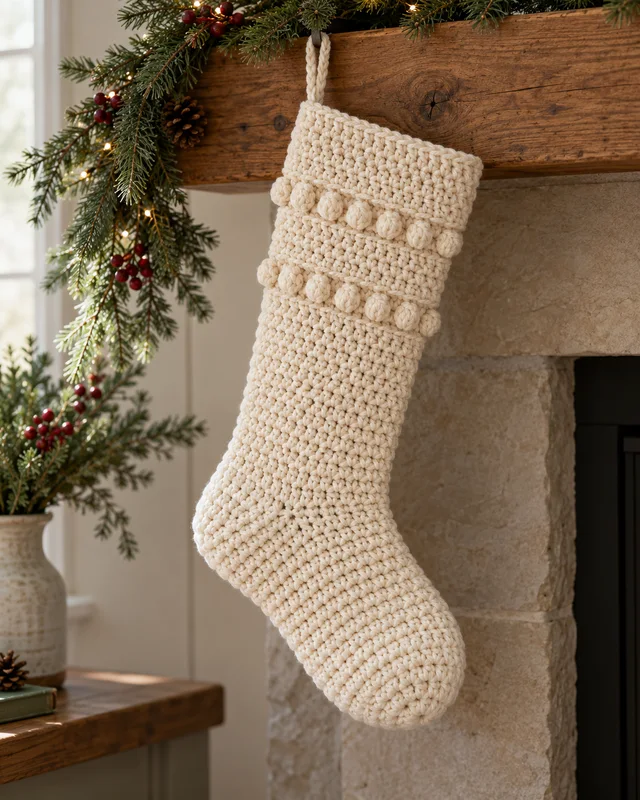
Two bobble bands make the raised details accents rather than the whole surface. Check their spacing on a complete repeat and assess the reverse side before choosing the final layout. Raised stitches can use more yarn and create a firmer area than plain fabric. Keep the foot shaping readable, and let the pattern account for how those bands meet the side or round transition.
11. Woven-look texture stocking
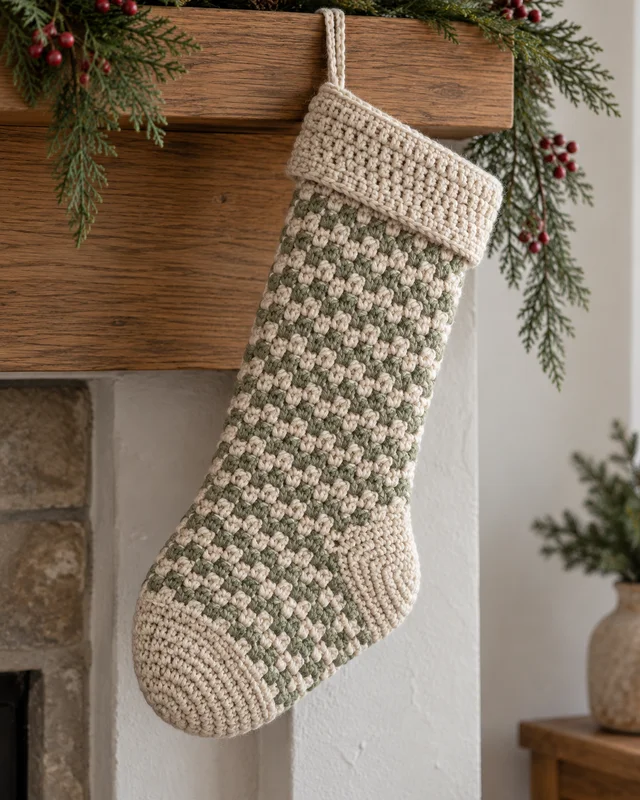
A small woven-looking texture creates a quieter all-over surface than deep ribs or large bobbles. The actual stitch pattern and yarn combination determine its feel, so identify it from written instructions rather than the image alone. Make a sample that includes both colors. Check the finished dimensions after the intended care process before assuming it will match a plain stocking pattern in the same yarn.
12. Scalloped-cuff stocking
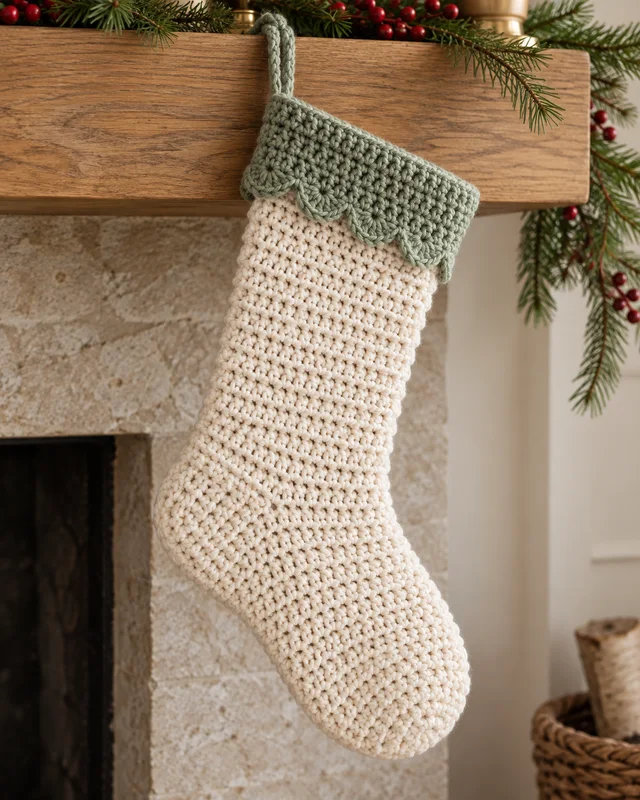
A scalloped cuff changes the upper outline while leaving the main stocking simple. The repeat needs to fit the actual opening, so use the pattern’s stitch multiple and spacing. Too many scallops may flare and too few may pull the top inward. Test the edge on a small sample if it is new to you, and keep the hanging loop clear of delicate scallop tips.
13. Mini wide-foot stocking
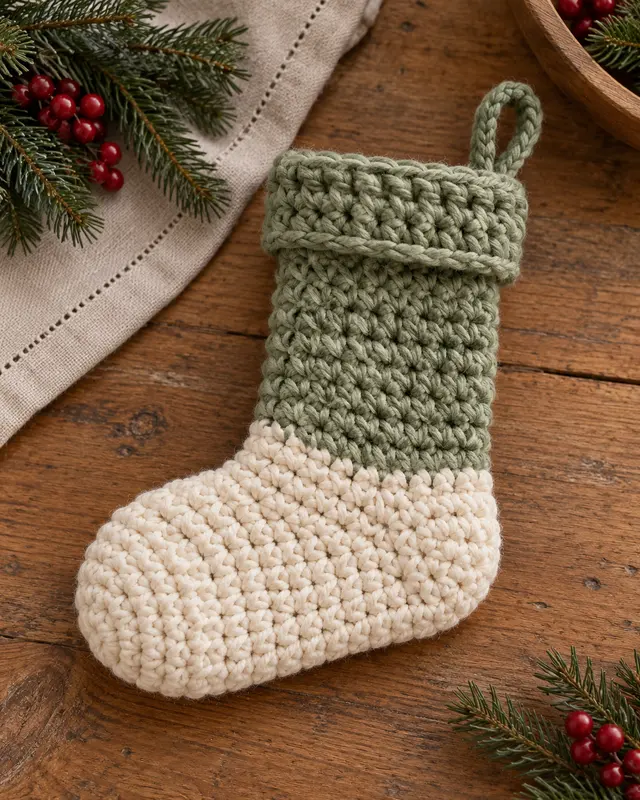
A small stocking with a broad foot emphasizes proportion rather than a long leg. It can suit a compact display where a tall version would crowd the space. Check the pattern’s width and opening separately, since the exaggerated foot does not guarantee useful interior room. Keep the scale deliberate and read the heel shaping rather than treating the small size as a reason to improvise it.
14. Tall slim display stocking
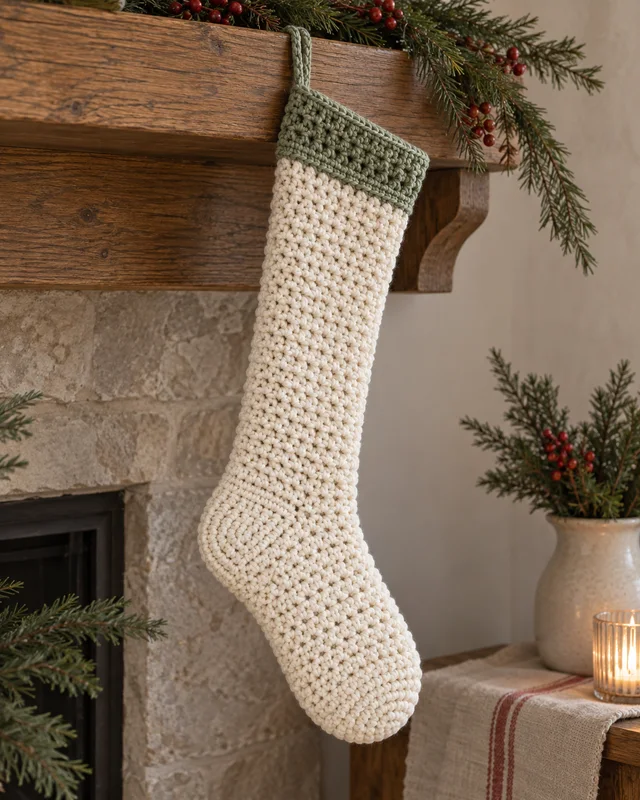
A tall slim stocking creates a long vertical line on a door or display rail. Measure the intended space before selecting the finished length, including room for the loop. A narrow opening may be decorative rather than practical for larger gifts. Follow the construction’s proportions, and check the hanging shape with the complete cuff and heel rather than judging the unfinished leg alone.
15. Short boot-style stocking
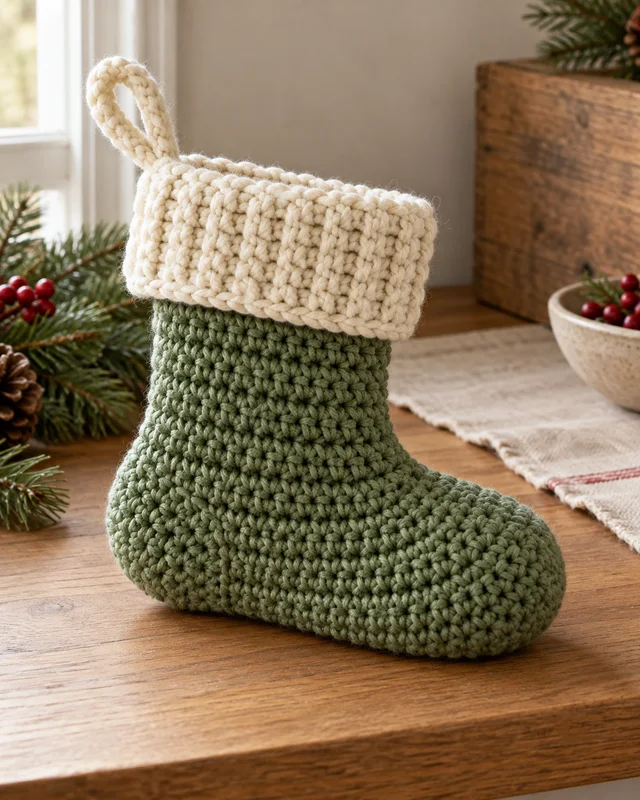
A short boot-style stocking concentrates the shape around the heel and ankle. It can offer a different scale within a group of traditional long stockings. Read the assembly carefully because the shorter leg leaves less plain fabric between shaped sections. Check the usable opening and choose the intended display purpose before deciding whether a lining or extra closure belongs in the project.
16. Rounded-toe stocking
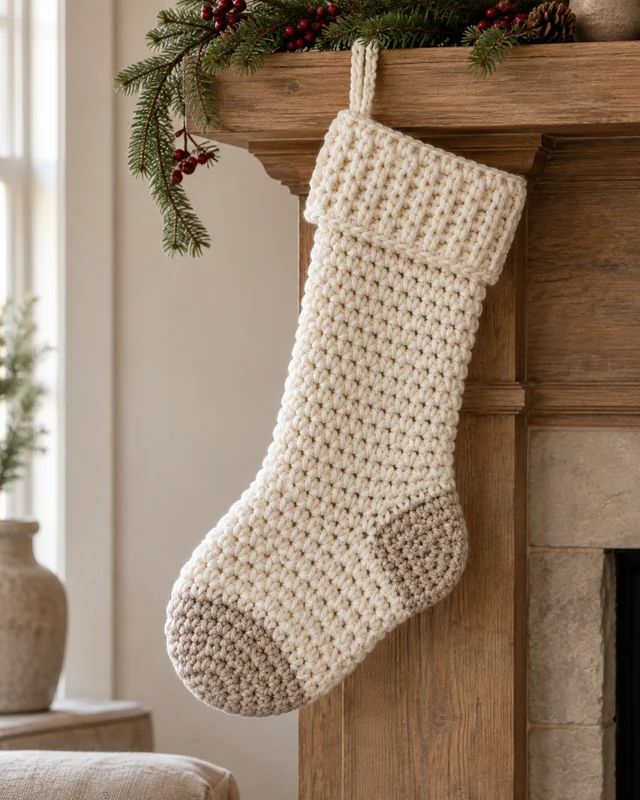
A rounded toe gives the foot a softer outline than a pointed decorative version. The curve should come from the pattern’s shaping, not from stretching the finished fabric. Compare the toe from both sides and inspect the lower seam if the construction uses one. A restrained heel and cuff leave room for that outline to be the feature of the stocking.
17. Curved elf-toe stocking
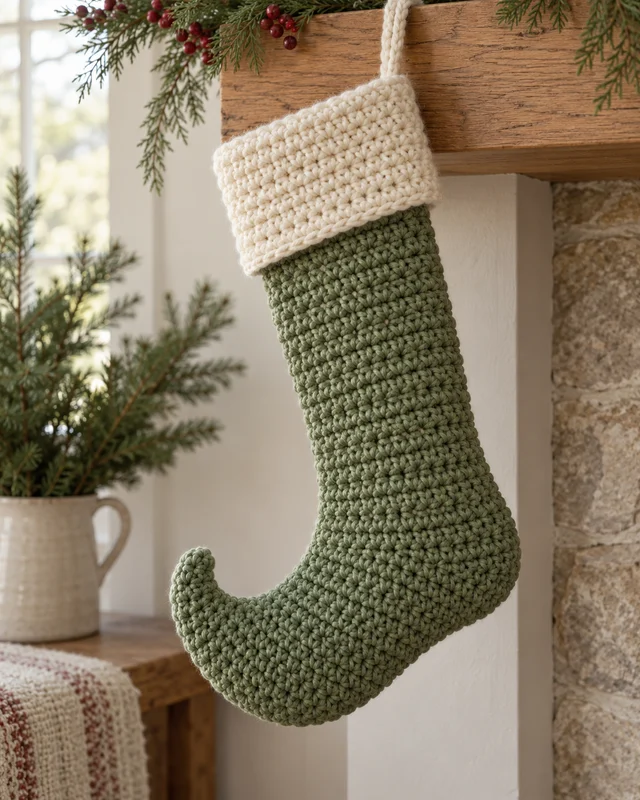
A curved elf-like toe makes the stocking deliberately decorative. Choose instructions designed for the curve, since adding random decreases to an ordinary foot can twist the whole shape. Check how the toe is finished and whether any filling is specified. Keep extra bells or rigid supports out unless the actual design explains suitable construction and the intended household use allows them.
18. Openwork panel stocking
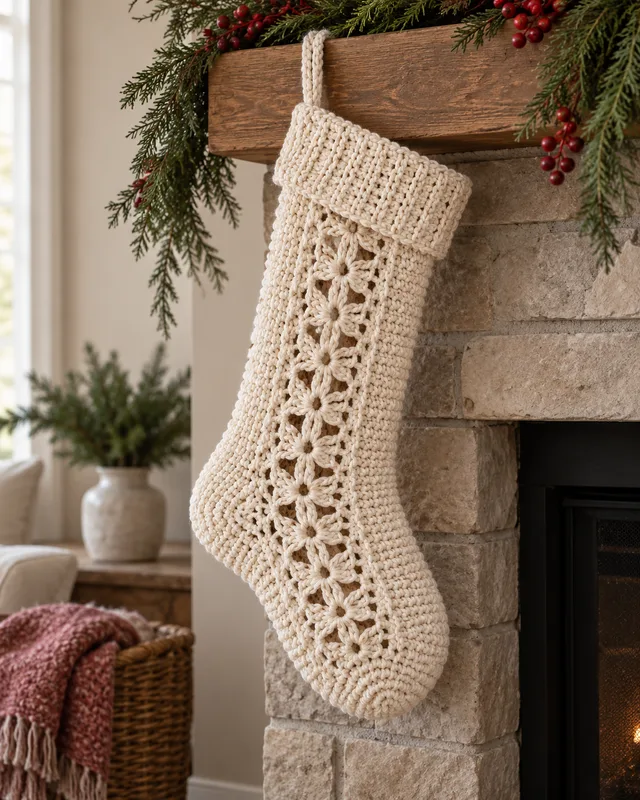
An openwork front panel introduces a different fabric behavior from dense sides or a plain back. Check how the panel is joined and how its dimensions are measured after finishing. If the stocking will contain small objects, follow an appropriate lining plan rather than assuming the openings will hold them. A decorative front view does not establish the item’s capacity or carrying strength.
19. Plain lined stocking
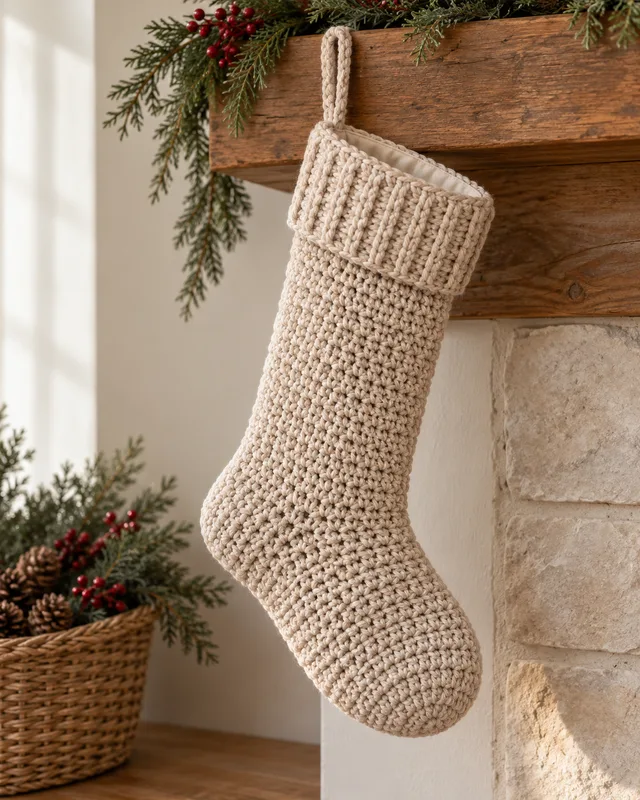
A plain lined stocking makes the interior an important part of the project. Fit the lining to the finished crochet shell, accounting for seams, heel and toe rather than using the outer dimensions alone. Keep the top attachment accessible until the fit is checked. The lining can cover openings and create a smoother interior, but it does not automatically reinforce the hanging loop.
20. Two-texture panel stocking
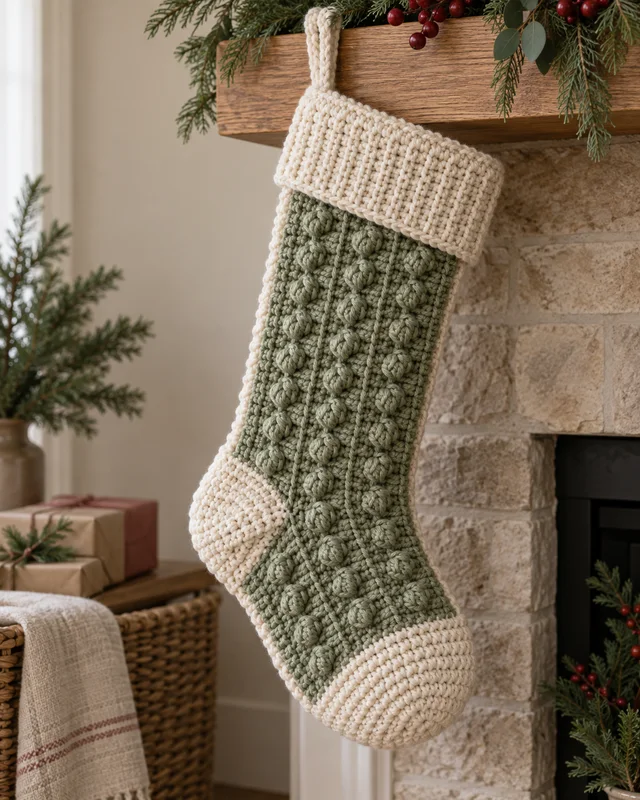
A textured front and smoother back let you choose which surface faces the room. The two panels still need matching dimensions even when they use the same yarn. Sample both textures and check the pattern’s method of joining them around the heel and toe. A small mismatch should be corrected in the panels instead of forced into place with an unusually tight seam.
21. Matching miniature stocking pair
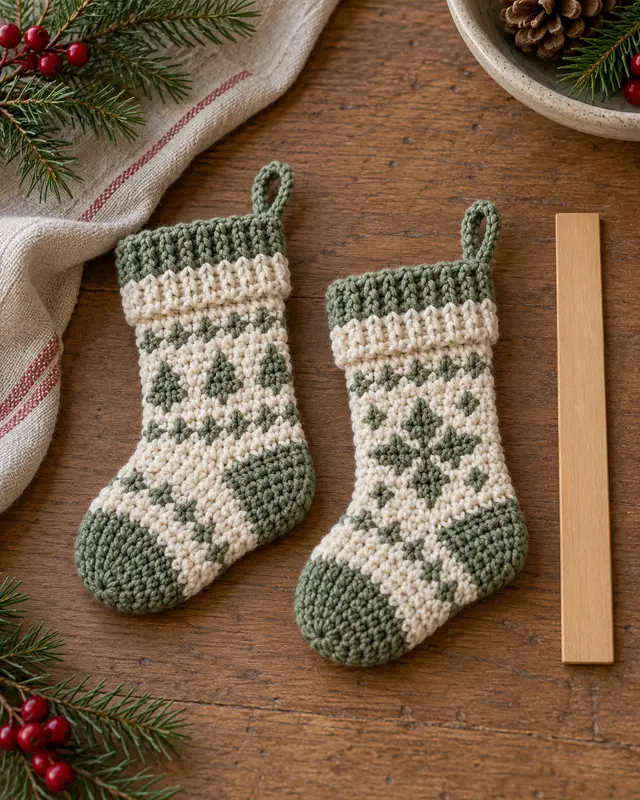
A pair of miniature stockings can coordinate through scale and construction without being identical in every color. Complete one first and record its finished dimensions, yarn and assembly method. Small cuffs and toes may be more awkward than a larger stocking’s pieces. Use the pattern’s supported sizing and assess the pair together before deciding their loops and display spacing are finished.
Choose the construction, then the surface
When flat panels make sense
Panels let you inspect the outline and seam before closing the whole object. Their edges need to match, and the joining tension becomes part of the finished shape. A decorative contrast seam works best when it follows an already sound pair of pieces.
When a shaped body is the lesson
A continuous stocking puts the heel and toe into the stitch sequence. Read those instructions before committing to the leg. Keep a row or round record and compare the intended direction of the foot while the shaping is still accessible.
When the lining becomes a second project
Fit a lining to the completed shell and its actual seams, not a front-view photograph. Keep the top attachment accessible until the interior works. The lining and hanging loop have different jobs; one does not automatically strengthen the other.
Measure the display space and read the yarn-selection guide before choosing a favorite texture. For a smaller seasonal start, compare the ornament collection.
- 13 Crochet Gingerbread and Snowman Decoration Ideas
Browse 13 crochet gingerbread and snowman decoration ideas, comparing flat motifs, padded figures, panels and simple seasonal pairings.
- How to Plan Handmade Christmas Projects Before the Holidays
Plan handmade Christmas projects from actual handover dates, recipient needs, complete samples, realistic sessions and a manageable display list.
- 23 Crochet Christmas Gift Ideas for Family
Find 23 crochet Christmas gift ideas for family, with notes on recipient use, measured fit, complete assembly and a clear care handover.
- 15 Crochet Christmas Tree Skirt Styles
Explore 15 crochet Christmas tree skirt styles by footprint, center opening, access split, border and closure before choosing a complete pattern.
- 17 Crochet Christmas Garland Inspirations
Compare 17 crochet Christmas garland inspirations by motif, spacing and display span, with notes on connections, background and storage.
- How to Choose Yarn for Durable Crochet Ornaments
Choose yarn for crochet ornaments by construction, visible detail, care and display. Build one sample before planning a matching seasonal set.
- 19 Crochet Snowflake Ideas for Winter Decorations
Browse 19 crochet snowflake ideas with different centers, arms and openwork, plus practical ways to compare flatness, display and seasonal storage.
- 25 Crochet Christmas Ornament Ideas for Handmade Trees
Explore 25 crochet Christmas ornament ideas, from flat stars to small padded shapes, with useful notes on loops, reverse sides, display and finishing.
- Christmas Crochet Ideas for Gifts, Ornaments and Winter Decor
Plan Christmas crochet gifts, ornaments and winter decor by purpose, materials and time, with guidance on scale, storage, finishing and reusable wrapping.