In this article
A fall garland can suggest the season through one leaf outline or a restrained sequence of colors. Its success depends on the whole line: motif widths, breathing room, a readable background and supports suited to the actual assembled strand. Making every motif before measuring the space can leave the most important arrangement decisions until the end.
The fifteen ideas below compare botanical, geometric and dimensional directions. They are editorial inspiration rather than counted patterns or proven hanging systems. Finish one complete motif and its connection using suitable instructions, then choose the final spacing from the real pieces. Keep the mount, placement, care and storage clear instead of expecting a photograph to supply those hidden practical details.
Give the rhythm a measured span
Record the usable display length, support positions and the width of a finished motif. Leave breathing room around the selected outlines before increasing quantity. The fall and Halloween hub connects the garland with the actual room, while the palette guide keeps the color sequence restrained.
1. Broad lobed leaf line
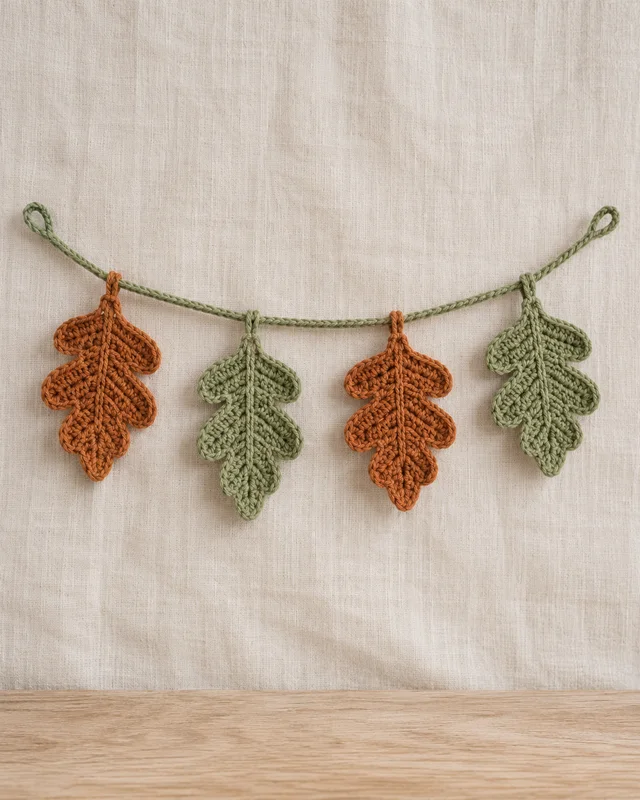
Lobed leaf silhouettes make a seasonal line through their outline rather than elaborate stitching. Finish one motif and compare the edges against the actual background before repeating it. Keep the attachment at a supported upper point so the leaf does not twist. A small rust, ochre and sage palette can suggest change across the strand while the same visual scale holds the arrangement together.
2. Oak-inspired leaf line

Elongated lobed leaves create a different rhythm from broad maple-like shapes. Their narrow tips need a complete shaping sequence and tidy finishing so the whole leaf remains legible. Try a finished motif hanging before deciding its orientation on the cord. The botanical resemblance is decorative, and the image should not be treated as an exact leaf chart or a countable crochet pattern.
3. Pumpkin-and-leaf sequence
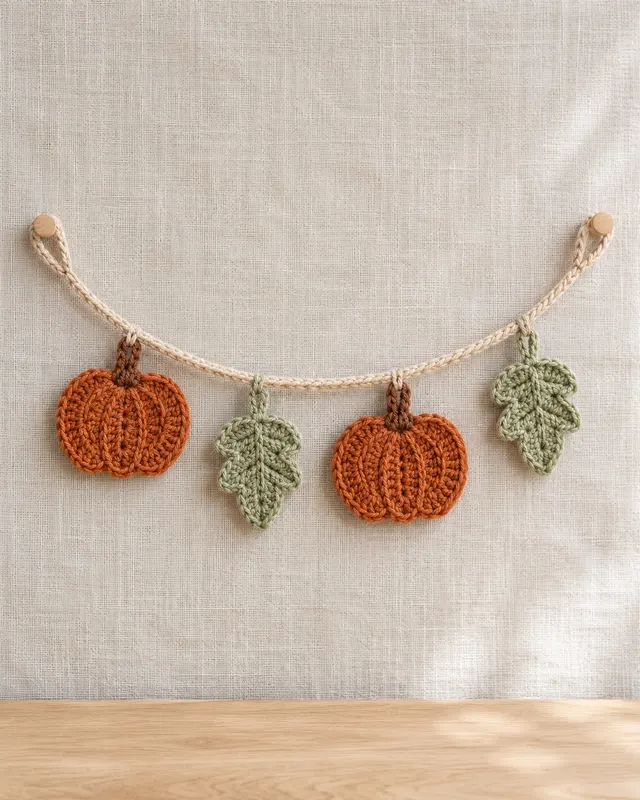
A pumpkin-and-leaf sequence works when the two motif types have compatible visual weight. Make one of each first, then compare their actual widths and the gaps needed between them. The round pumpkin should not overwhelm a very narrow leaf. Keep the connections clear and short, allowing the complete strand and both end mounts to be assessed together in the intended display position.
4. Acorn outline garland

Flat acorn silhouettes offer a small shape with a useful two-color division. Keep the cap and lower body distinct without adding separate hard pieces. A supported upper attachment should preserve the outline rather than pull the cap into a point. Repeat the same motif scale through the row, and let spacing provide breathing room instead of filling every remaining length of cord with another acorn.
5. Triangle color bunting
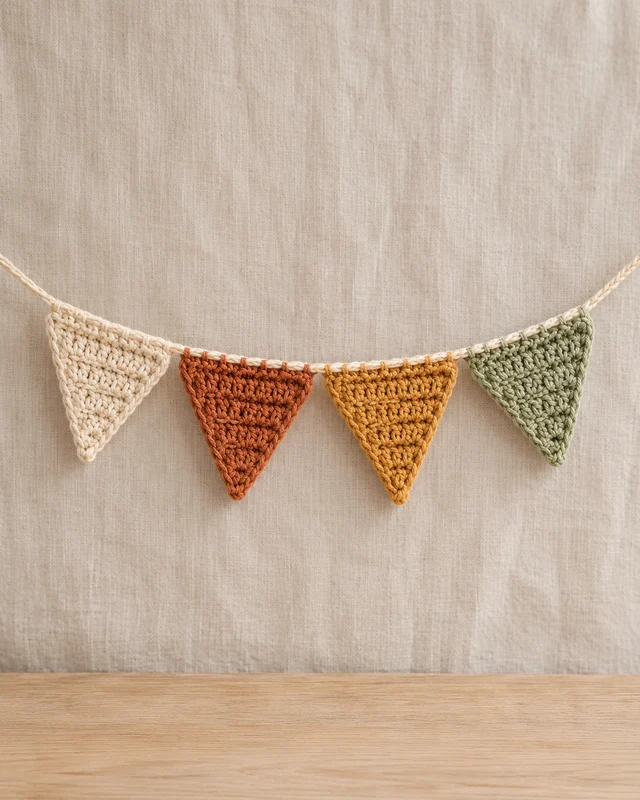
Plain triangles put the autumn palette in the foreground. Their upper edges need consistent finished width and suitable support even when the stitch is simple. Arrange the colors on the worktable before joining, checking whether a dark triangle needs a lighter neighbor to remain distinct. Keep a record of the sequence so the finished bunting can be rehung without repeatedly loosening and retightening its connections.
6. Granny square autumn row
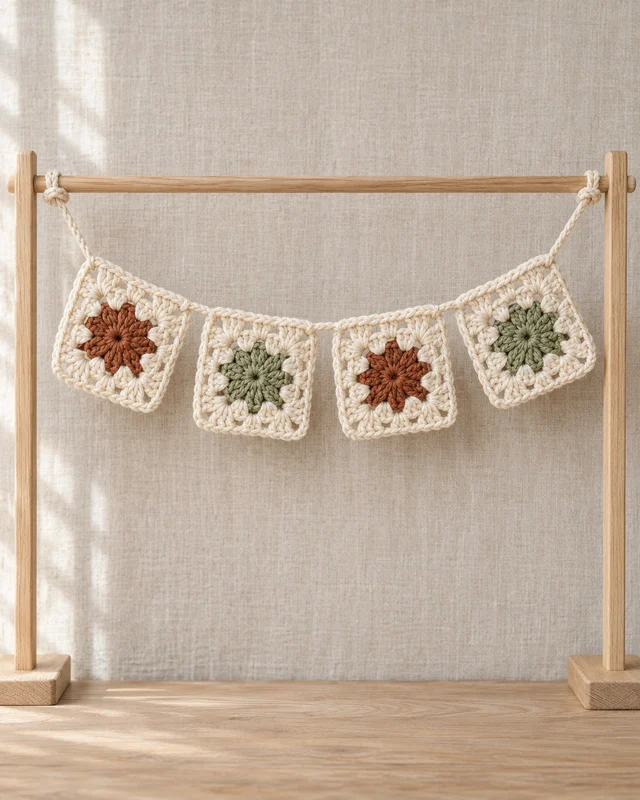
A granny-square row can use color placement rather than a new motif for every position. Finish the units to compatible dimensions and support their upper edges through the chosen garland construction. The outer cream round can keep the sequence coherent across rust and sage centers. Avoid stretching a smaller square to match the rest; resolve its actual fabric or choose a different finished unit.
7. Small pear motif line
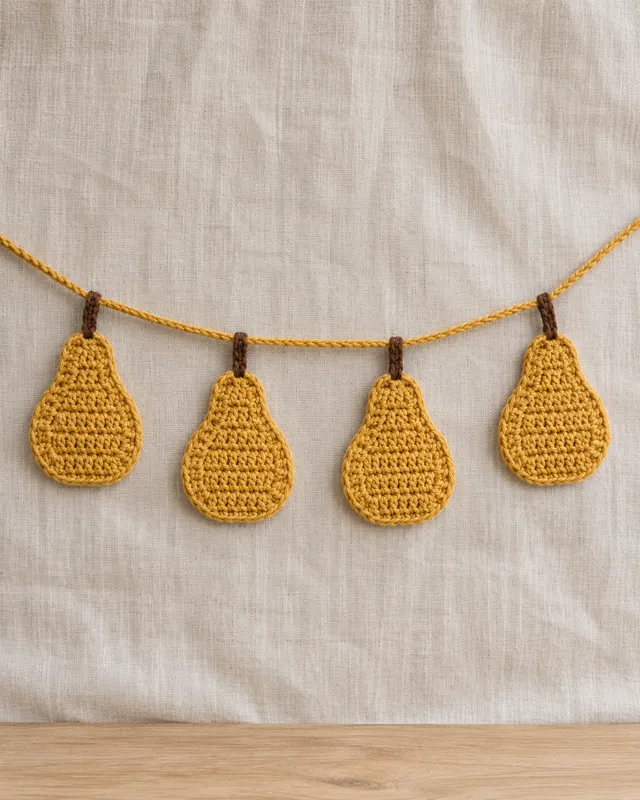
Pear shapes can bring a harvest reference without adding another pumpkin. Keep the narrow upper section and rounded lower body readable after finishing. The stem should be a secure part of the motif or a supported attachment, not a loose decorative thread. Compare the full strand at viewing distance, where small details may disappear and the basic silhouette needs to carry the idea.
8. Round harvest medallions
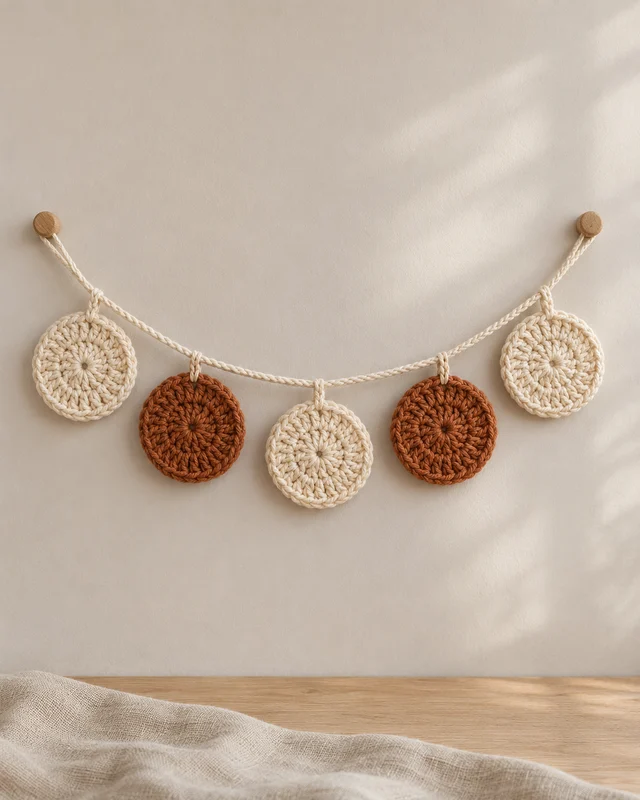
Round medallions offer a calmer interval between more figurative autumn decorations. Keep their centers and outer edges flat through the chosen construction. A restrained sequence of cream and rust can give the row movement without a different stitch for each disk. Decide the final spacing after finishing, since a slight change in yarn or tension can alter the real width and hanging behavior.
Finish one connection with its real motif
The cord, motif and complete assembled strand have different jobs. Keep the attachment supported and inspect the actual hanging angle before repeating it. Assess the whole display and suitable end mounts, with cords and small parts appropriately placed rather than relying on the apparent lightness of one leaf.
9. Mushroom silhouette line
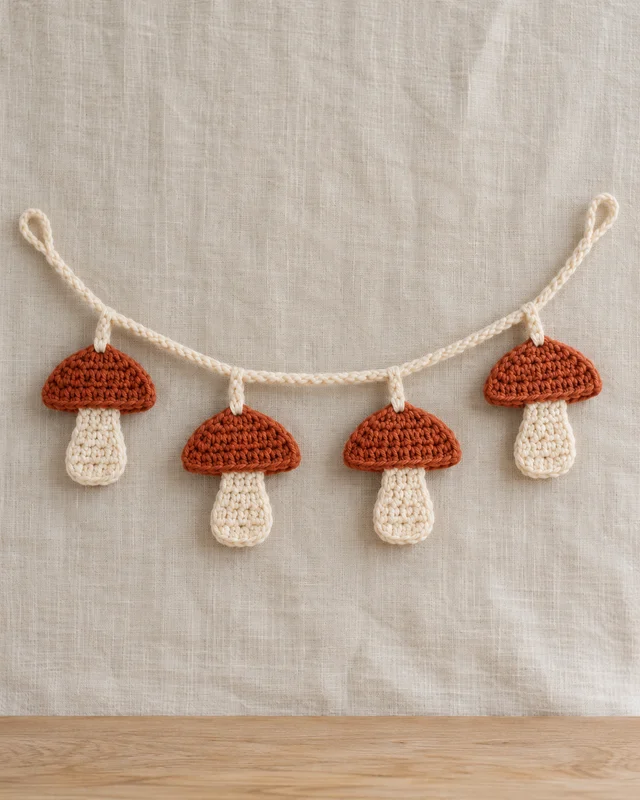
A mushroom silhouette needs a distinct cap and stem to remain recognizable at a small scale. Keep the two yarns compatible and finish the connecting area carefully. These are decorative motifs, separate from food or identification of real fungi. A short supported row can make the repeated shape readable, with the background chosen to show the cream stems as clearly as the darker caps.
10. Leaf pair clusters
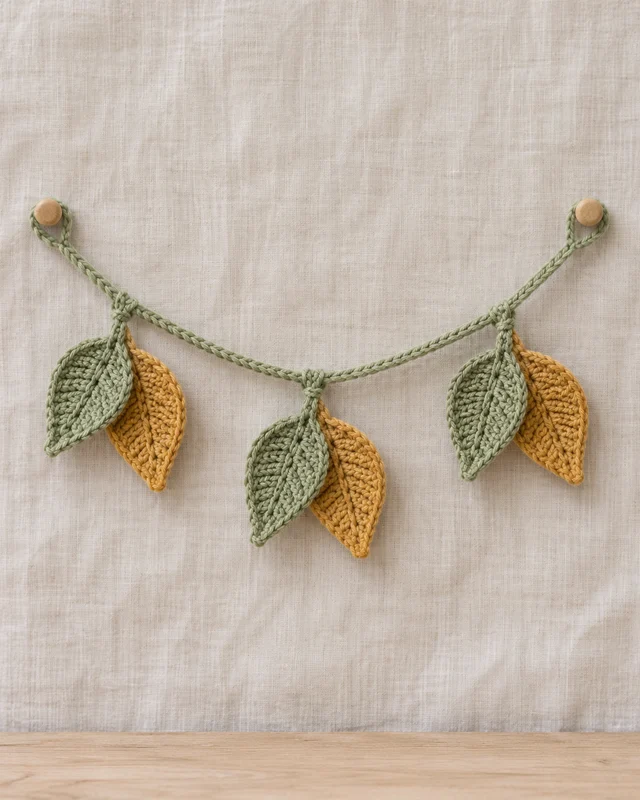
Paired leaves form small clusters that can alternate direction along a strand. Complete the pair and its connection before deciding how much space it needs. The two leaves should not depend on a tight cord to hold their relative angle. A simple shared attachment can make care and storage easier when the complete design supports it, keeping each cluster from tangling into the next.
11. Short woodland mix
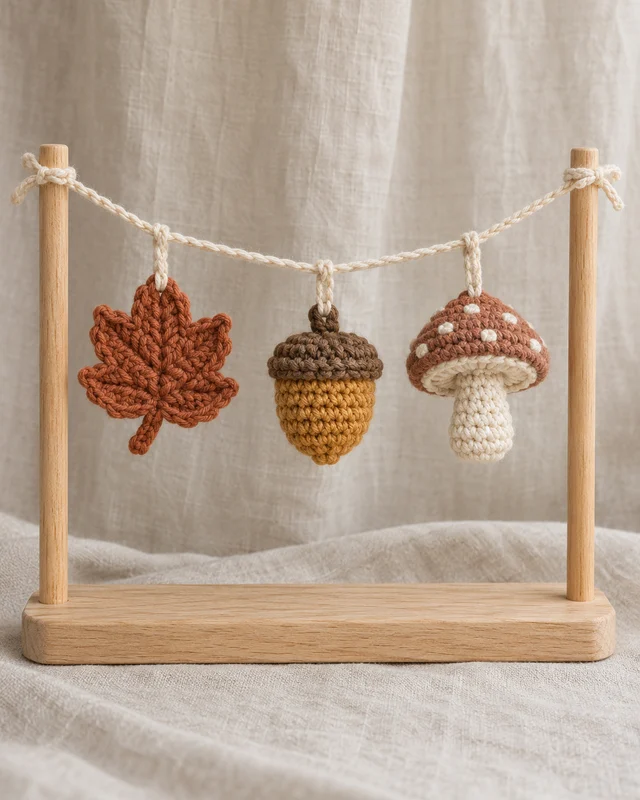
A woodland mix can stay coherent with only three motif types when they share an outline scale and restrained palette. Finish the leaf, acorn and mushroom separately, then try their order against the intended background. Equal cord gaps may not look even between different widths. Keep a layout record and choose support for the whole assembled strand rather than assuming the lightest individual motif sets its needs.
12. Geometric diamond bunting
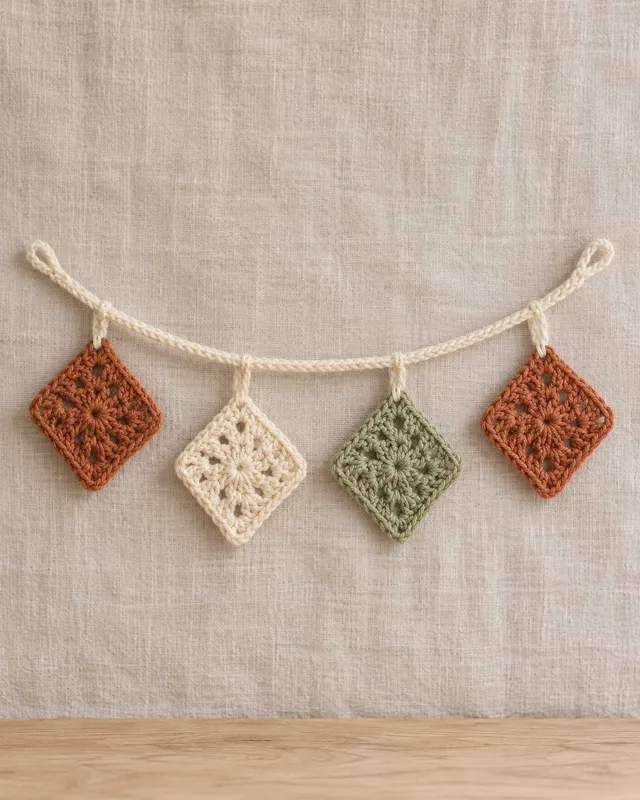
Diamonds give the mantel a geometric option without a literal seasonal character. Their points should settle naturally after finishing, and the top connection must not pull them into narrow triangles. Compare a rust, cream and sage sequence before adding another shade. A short line with clear gaps can show the changing colors more effectively than a crowded run of closely joined units.
13. Soft mini pumpkin strand
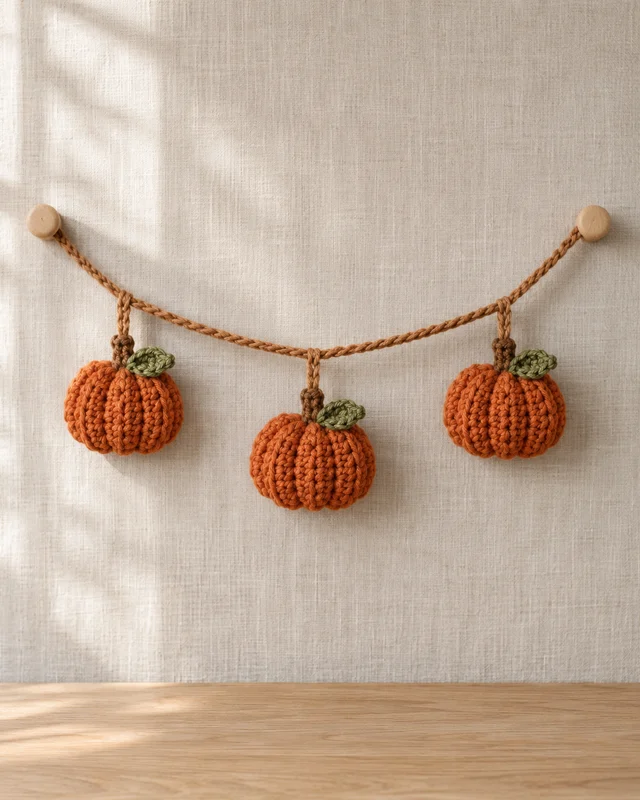
Small padded pumpkins make a deeper garland and add actual weight to the line. Use a complete closed construction and assess the finished pieces with their chosen support system. The attachment should be clear enough to inspect before every display. A modest group can give the intended dimensional effect without relying on a longer strand whose extra pieces crowd the mantel or overload an unsuitable mount.
14. Neutral texture pennants
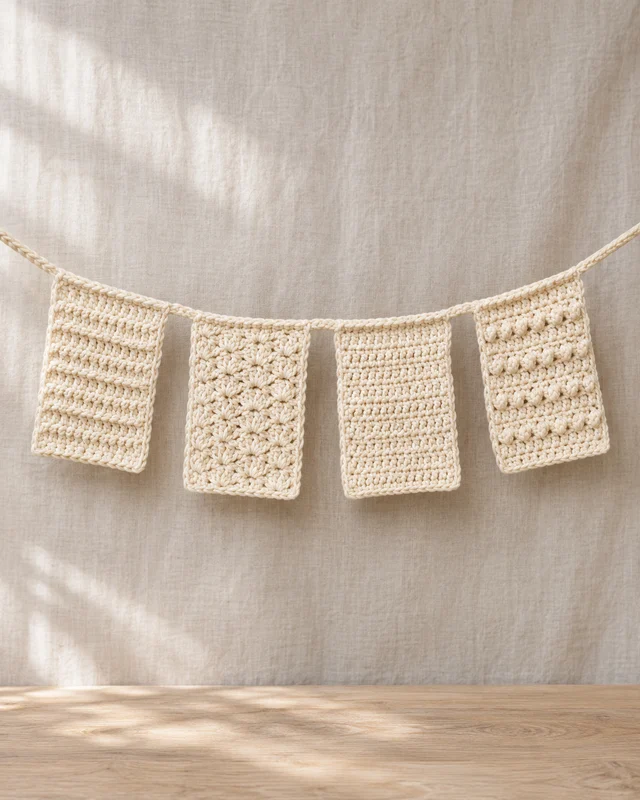
Neutral rectangular pennants shift attention from color to texture. Choose surfaces with enough difference to read at the actual viewing distance, then keep their widths compatible. Sample the upper edge and hanging tabs as part of each design. Different stitch patterns can produce different relaxed dimensions, so equal starting counts alone do not establish that the completed pennants will hang in a neat row.
15. Ribbon-linked leaf squares
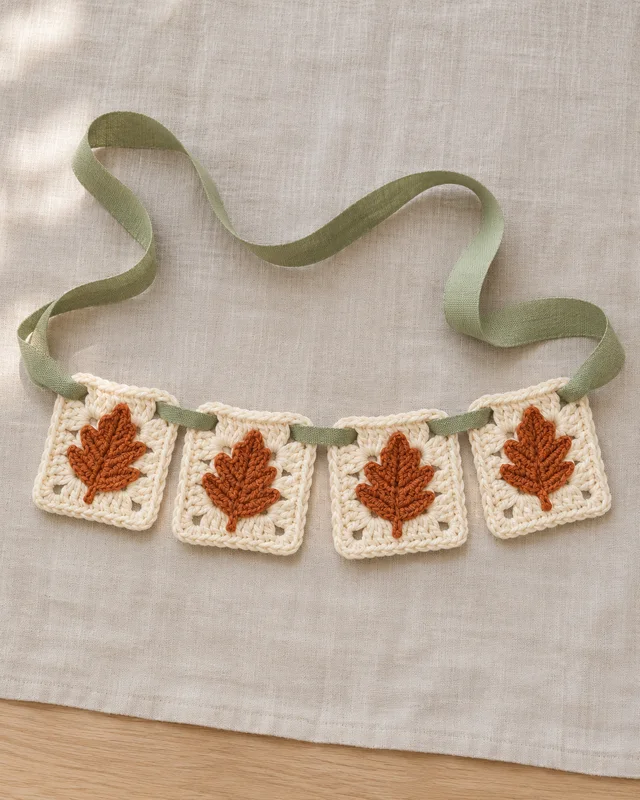
A broad ribbon can link leaf squares while supplying a calm continuous line. Check the actual openings used for threading and avoid stretching the crochet corners to admit the ribbon. Fit the whole arrangement before securing its ends. The ribbon, motifs and mount need compatible handling, with a clear removal and care method rather than permanent joins that hide the individual connections from later inspection.
Keep the sequence with the stored pieces
Save the actual motif order, support information and compatible care. A photograph can help restore the arrangement without proving hidden joins. The storage guide keeps flat shapes and padded pumpkins from being packed in the same compressed way, making the next seasonal display easier to understand.
- How to Choose Fall Crochet Colors and Textures
Choose fall crochet colors and textures through a room anchor, clear palette roles, small comparable samples and an actual material record.
- 13 Cute Crochet Halloween Gift and Treat-Bag Ideas
Compare 13 crochet Halloween gift and treat-bag ideas, with practical notes on openings, lining, separate packaging and reusable presentation.
- 23 Crochet Autumn Table Decor Ideas
Find 23 crochet autumn table decor ideas across runners, mats, napkin bands and small containers, with flatness, fit and care in view.
- 19 Crochet Witch Hat Design Ideas
Browse 19 crochet witch hat design ideas for decorative displays, comparing cone shapes, brim footprints, bands and flat motif alternatives.
- 17 Crochet Bat Ideas for Halloween Displays
Compare 17 crochet bat ideas for Halloween displays, including wing shapes, contrast, mounted panels, garlands and small paired motifs.
- 21 Crochet Ghost Decoration Inspirations
Explore 21 crochet ghost decoration inspirations by outline, display method, backing, attachment and useful seasonal scale.
- 25 Crochet Pumpkin Decor Ideas for Fall
Compare 25 crochet pumpkin decor ideas, from shaped shelf pieces to flat motifs, small containers and autumn display pairings.
- Fall and Halloween Crochet Ideas for Cozy Seasonal Decor
Plan fall and Halloween crochet by room, object role and palette, with routes to seven idea collections and practical color and storage guides.
- How to Plan and Store Seasonal Crochet Decorations
Plan and store seasonal crochet decorations with clear removal, compatible care, supported shapes, identified parts and a useful next-season inventory.