In this article
A crochet animal begins with a shape you can understand. A rounded bear, a low cat loaf and a long-necked giraffe may all be small, but they ask for different shaping and assembly skills. Start by choosing the kind of body you want to make, then look at how many pieces, color changes and finishing details give it character.
This guide helps you compare amigurumi animal ideas and recognize the practical work behind them. It is a route to choosing a project, not a complete animal pattern. Follow your selected pattern for rounds, counts, shaping and attachment positions. A clear body shape and thoughtful finishing matter more than adding many accessories to a first attempt.
Begin with skills, then choose the animal
Before starting a shaped animal, be comfortable finding a stitch, counting a round and recognizing where it begins. Many amigurumi patterns use US single crochet with increases and decreases, but read the actual terminology and instructions rather than applying that assumption to every design. A stitch marker and short progress notes can make it much easier to return to the work.
If those basics are new, practice a small unstuffed sample first and use the single and half double crochet lessons for familiar movements. Then choose a complete beginner-oriented amigurumi lesson that explains its starting method, rounds and closure. Learning the foundation before adding several body parts makes the finished animal easier to understand.
Compare three useful body families
Rounded bodies with a few identifying details
A bear, chick or owl can keep most of the form compact. Ears, a beak or wing placement create the identity without needing long limbs. That can make the overall construction easier to picture, though the small details still need secure attachment. Read whether the head and body are joined or worked separately, because similar-looking animals can have different assembly demands.
Low, oval and horizontal forms
A cat loaf, whale or resting seal shifts the focus to the outline of one main body. These can be appealing when you want fewer long appendages. Check how the base closes and where fins or ears meet the body. Even stuffing is important: the intended low shape can become distorted if you fill one area much more firmly than another.
Longer or more shaped animals
A bunny’s ears, an elephant’s trunk or a giraffe’s neck introduce different proportions and joins. A seahorse or dinosaur may also need deliberate curves and balance. Save these directions for when you are comfortable following shaping instructions and checking several parts together. A short list of stitches does not necessarily make the whole assembly an easy first project.
Find a starting idea
Browse 25 crochet animal ideas for beginners to compare those forms. Start with a compact animal whose construction you can explain after reading the pattern. Choose one new skill to practice, such as a pair of ears or a simple color change, rather than adding several unfamiliar features at once.
The wider topic also includes planned collections on bunny ideas, cat plush ideas and frog and turtle characters. Published articles appear in the topic list as they become available. You can keep a favorite silhouette in mind without needing to rush into the most detailed version first.
Choose supplies you can see and handle
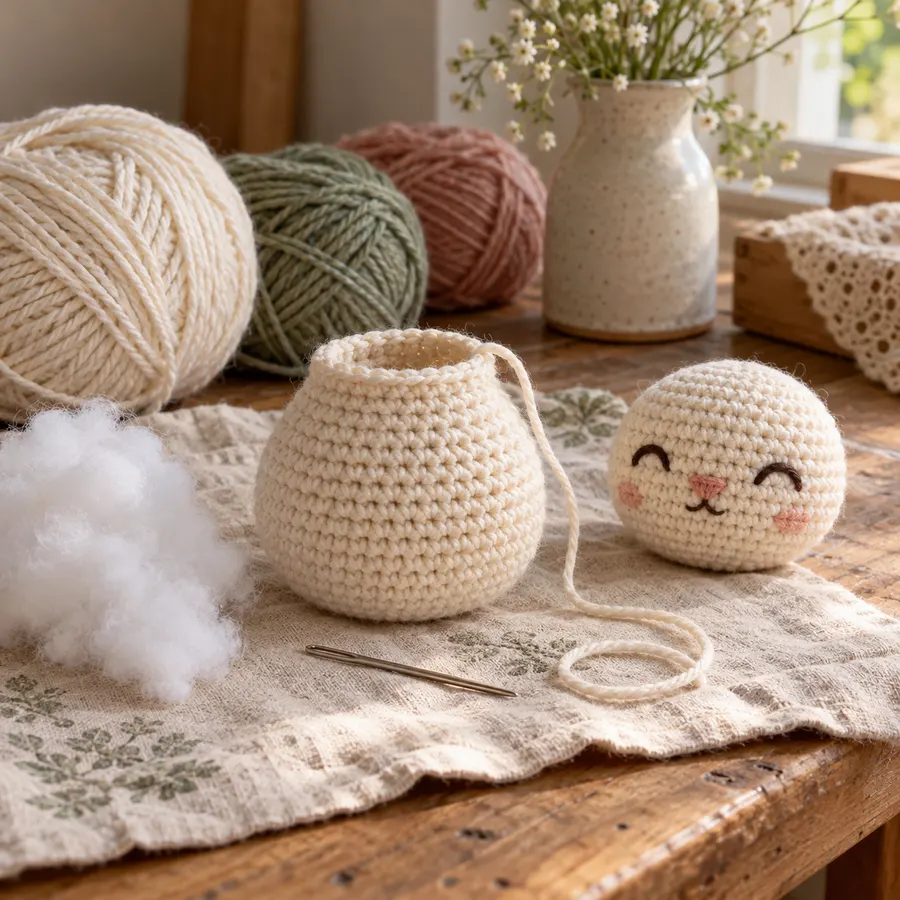
Use the materials specified by the complete pattern, including yarn, hook, stuffing and finishing tools. A smooth, visible yarn can make counting easier to learn than a very fuzzy surface. Keep the yarn label so you can check care later. A small tool or a very thick yarn is not automatically easier; choose a manageable combination and practice the fabric first.
Check the fabric before closing a stuffed form. If large gaps open around the stuffing, review the gauge, shaping and filling instead of hiding the problem with more decoration. The pattern should guide the required fabric and how the opening is closed. Avoid replacing materials casually when their thickness or behavior affects the shape.
Plan the face while the pieces are accessible
An expression depends on position as much as on detail. Compare the eyes, nose and ears from the front and side before securing them permanently. Keep the face simple if it is your first embroidered expression. It is often easier to judge a few deliberate stitches than a large collection of tiny features competing for space.
The examples here favor embroidered features and omit loose decorative accessories. That choice does not certify a finished animal as suitable for a child. Consider the actual construction, materials, recipient and intended use separately. A decorative shelf piece and a child’s toy have different expectations; do not assume a cute appearance establishes suitability.
The CPSC toy-safety guidance advises matching toys to age guidance and keeping toys with small parts away from children younger than three. Use appropriate product-safety guidance for an actual child’s toy rather than relying on a gallery image.
Assembly is part of the project
Lay out the parts before sewing and compare the left and right sides. Check that the shape sits or rests as intended, then follow the pattern’s attachment method. Do not rely on a few surface stitches where the design requires a more secure join. Keep track of where each yarn end is finished so nothing is left loose inside an inaccessible seam.
Allow a separate session for this stage if needed. Finishing a body does not mean the animal is almost done when it still needs several small limbs, a face and careful alignment. A simple, securely finished version can be more satisfying than a complicated silhouette rushed at the last step.
Common first-amigurumi difficulties
- The round count drifts: mark its beginning and count before moving on, using the pattern’s joining convention.
- The paired parts differ: compare tension and finished size before attaching them.
- The body loses its intended shape: check stuffing distribution and the shaping sequence rather than forcing it with more filling.
- The animal leans unexpectedly: inspect placement and balance while the parts can still be adjusted.
- The face looks uneven: compare the position from a normal viewing distance before adding more stitches.
Frequently asked questions
Does “low sew” mean beginner?
It describes the amount of separate assembly, not every skill. A low-sew design can still use shaping, small openings or parts joined during the rounds. Read the complete pattern and compare it with the skills you already have.
Can I make the same animal much bigger by changing yarn?
Changing yarn and hook can alter scale, weight, gaps and the way the parts sit together. Use a pattern that supports the intended materials, or treat the change as something that needs fresh sampling and careful checks rather than a guaranteed enlargement.
Should a first animal have lots of accessories?
Keep the first version focused on its shape and secure finishing. Accessories add separate work and can introduce loose parts or cords. A plain embroidered face and well-placed ears often give a small animal enough character.
Choose one small, clear next step
Start with the body family that makes sense to you, then choose complete instructions whose assembly you can follow. Return to the crochet starter-kit guide if tools are the obstacle, or compare the beginner animal collection when you are ready to choose the silhouette. Let the first project teach one useful skill rather than asking it to do everything.
- How to Read Amigurumi Rounds and Track Stitch Counts
Read amigurumi rounds with clear repeat arithmetic, first-stitch markers, round records and practical checks for increases, decreases and count errors.
- 23 Mini Amigurumi Ideas for Keychains and Bag Charms
Browse 23 mini amigurumi keychain and bag charm ideas, from animals to fruit and simple shapes, with attachment and finishing notes for adult accessories.
- 13 Farm Animal Crochet Toy Inspirations
Compare 13 farm animal crochet toy inspirations by pose, silhouette, texture and assembly, with guidance on selecting an appropriate complete design.
- 15 Woodland Animal Amigurumi Ideas
Find 15 woodland animal amigurumi ideas distinguished by tails, ears, poses and texture, with practical notes on assembly and choosing a complete design.
- How to Stuff and Shape Crochet Animals Evenly
Learn a practical approach to stuffing and shaping crochet animals: check the fabric, add filling gradually, compare paired parts and inspect the final joins.
- 17 Crochet Cat Plush Ideas for Cat Lovers
Compare 17 crochet cat plush ideas, including loaf cats, sleeping shapes, shelf-sitters and cushions, with useful guidance on faces, patches and assembly.
- 21 Crochet Frog and Turtle Character Ideas
Explore 21 crochet frog and turtle character ideas, from tiny pond frogs to domed-shell turtles, with practical notes on limbs, shells and assembly.
- 19 Crochet Bunny Ideas for Gifts and Decor
Explore 19 crochet bunny ideas, from pocket rabbits to floppy-ear figures and cushions, with practical notes on proportions, shaping and finishing.
- 25 Cute Crochet Animal Ideas for Beginners
Browse 25 cute crochet animal ideas for beginners and next-step makers. Compare simple bodies, shaping, assembly and embroidered details before choosing a pattern.